Free Raspberry Pi Remote Access: Your Ultimate Guide
Can you truly access your Raspberry Pi from anywhere in the world without spending a dime? The answer is a resounding yes, and it's a capability that unlocks a universe of possibilities for both beginners and seasoned tech enthusiasts.
In an era defined by constant connectivity, the ability to remotely manage and control our devices has become less a luxury and more a necessity. The Raspberry Pi, a marvel of miniaturization and affordability, stands as a testament to this trend. Its versatility allows it to seamlessly integrate into myriad projects, from intricate home automation systems to sophisticated server deployments. The key to unlocking the full potential of your Raspberry Pi lies in mastering free remote login, a skill that can transform your device from a local asset into a global one.
However, before diving into the technical intricacies of remote access, it's essential to acknowledge the paramount importance of security and reliability. This guide will not only provide you with a comprehensive understanding of configuring free remote login but will also equip you with the knowledge to do so in a manner that prioritizes both the safety of your data and the smooth functioning of your system. Let's begin this exciting journey of discovery!
- Remote Iot With Raspberry Pi Build A Free Vpc Today
- Secure Remote Access Remoteiot Vpc Ssh Free Downloads
The allure of free remote login to a Raspberry Pi extends far beyond mere convenience; it represents a significant paradigm shift for users seeking to maximize their device's capabilities. This newfound access empowers you to:
- Connect to your Raspberry Pi from any location, provided you have a stable internet connection.
- Streamline project management by simultaneously controlling multiple Raspberry Pi devices, allowing for greater efficiency and reduced overhead.
- Avoid the financial burden of subscription services while still enjoying the advantages of robust remote access features.
The advantages of remote access are far-reaching, regardless of whether you're operating a server, hosting a website, or managing a network of IoT devices. Moreover, the absence of associated costs associated with free solutions makes this an exceptionally attractive option, catering to both tech novices and seasoned professionals.
For any aspiring user, ensuring that the necessary prerequisites are in place is crucial before embarking on the journey to set up a free remote login for your Raspberry Pi.
Hardware Requirements
- A Raspberry Pi device (any model with network capabilities).
- A stable internet connection for both your Raspberry Pi and your remote device.
- A keyboard, mouse, and monitor for initial setup (optional if using SSH).
Software Requirements
- Raspberry Pi OS installed on your device.
- A remote access client such as PuTTY (for Windows) or Terminal (for macOS/Linux).
- A dynamic DNS service account (optional but recommended for easier access).
With these essential tools at your disposal, the setup process will be significantly simplified and expedited. Let's proceed to the subsequent step!
SSH (Secure Shell) is undoubtedly one of the most prevalent methods for enabling remote login to your Raspberry Pi. It offers a secure and encrypted connection, effectively safeguarding your data during transmission. Here's a step-by-step guide to configuring SSH:
Enabling SSH on Raspberry Pi
- Initiate the process by booting your Raspberry Pi and logging into the desktop environment.
- Open the terminal application. This can be done by clicking the terminal icon, or by simultaneously pressing the keys Ctrl+Alt+T.
- Enter the following command:
sudo raspi-config. This command initiates the Raspberry Pi configuration tool. - Navigate to the "Interfacing Options" menu and select "SSH."
- When prompted, choose "Yes" to enable SSH.
Once SSH is activated, your Raspberry Pi will be ready to accept remote connections. Remember that the default port for SSH is 22. Make certain that this port is open on your router if you intend to access the device from outside your local network.
To access your Raspberry Pi from the global internet, it's essential to configure port forwarding on your router. This process involves directing incoming traffic on a specific port to your Raspberry Pi's local IP address. Here's how to do it:
Steps for Port Forwarding
- Access your router's admin interface by entering its IP address in your web browser (typically 192.168.0.1 or 192.168.1.1).
- Locate and navigate to the "Port Forwarding" or "Virtual Servers" section within your router's settings.
- Create a new rule, configuring the following settings:
- Service Port: 22 (for SSH)
- Internal IP Address: Your Raspberry Pi's local IP address (e.g., 192.168.1.10)
- Protocol: TCP
- Save the changes and restart your router, if required.
With port forwarding correctly configured, your Raspberry Pi is now accessible from the internet. To make the connection process more user-friendly, consider setting up a dynamic DNS service.
Dynamic DNS (DDNS) is a valuable tool that lets you assign a memorable domain name to your Raspberry Pi's IP address, even if the IP address changes frequently. This functionality removes the need to memorize complex IP addresses and significantly simplifies the remote access process. Several well-regarded DDNS services are available, including No-IP, DuckDNS, and Dynu.
Setting Up DuckDNS
- Visit the DuckDNS website and create a free account.
- Choose a domain name for your Raspberry Pi and take note of the provided token.
- Install the DuckDNS client on your Raspberry Pi by running the following commands in the terminal:
sudo apt updatesudo apt install curlcurl https://www.duckdns.org/install.sh | bash
- Follow the on-screen prompts to enter your domain name and token.
After configuration, your Raspberry Pi will automatically update its IP address with DuckDNS, ensuring seamless remote access.
The security of your remote connection is of paramount importance. Here are some best practices to help you protect your device:
Change Default SSH Port
Altering the default SSH port (from 22 to a non-standard number) can act as a deterrent against automated attacks. Here's how to do this:
- Edit the SSH configuration file using this command:
sudo nano /etc/ssh/sshd_config. - Find the line that says
Port 22and change the number to a different, non-standard port number (for example, 2222). - Save the file, and then restart the SSH service:
sudo service ssh restart.
Use Strong Passwords or SSH Keys
It is highly advisable to replace weak passwords with stronger ones or, better yet, to utilize SSH keys for authentication. Here's how to generate an SSH key:
- On your local machine, run the following command:
ssh-keygen -t rsa. - Copy the public key to your Raspberry Pi:
ssh-copy-id pi@your-duckdns-domain. - To further enhance security, disable password authentication in the SSH configuration file.
Although SSH is the most commonly used method for remote access, other free options are worth exploring.
VNC (Virtual Network Computing)
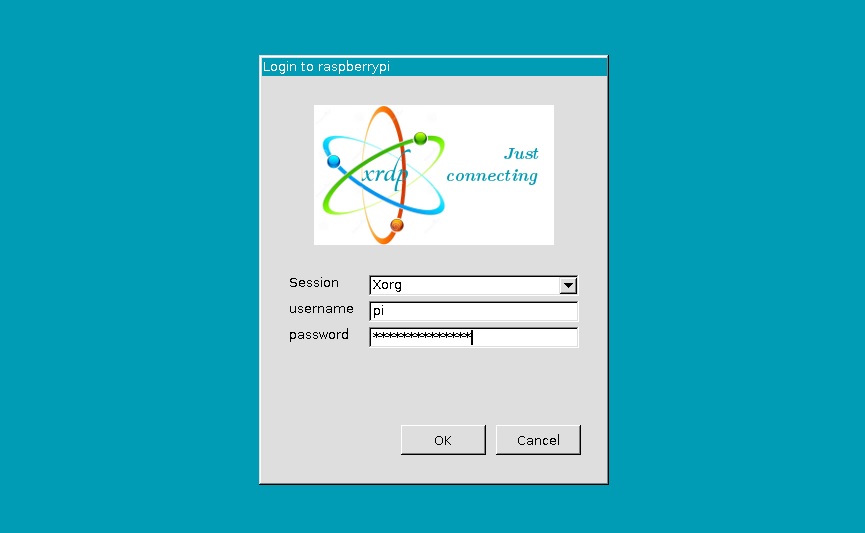
VNC allows you to remotely access the graphical desktop of your Raspberry Pi from another device. To set up VNC:
- In the Raspberry Pi Configuration tool, enable VNC.
- Install a VNC client on your remote device (e.g., RealVNC Viewer).
- Connect to your Raspberry Pi using its IP address or DDNS domain.
Web-Based Interfaces
Certain applications, such as Pi-Hole and Home Assistant, provide web-based interfaces accessible remotely. Be sure these interfaces are protected with robust passwords and utilize HTTPS encryption for secure access.
Even with careful configuration, issues can arise when setting up free remote login to your Raspberry Pi. Below are some common problems and their solutions:
Unable to Connect via SSH
- Verify that SSH is enabled on your Raspberry Pi.
- Ensure port forwarding is correctly set up on your router.
- Confirm that your Raspberry Pi's IP address matches the address specified in the port forwarding rule.
Slow Connection Speeds
- Optimize your network settings for enhanced performance.
- If your bandwidth is insufficient, consider upgrading your internet plan.
To optimize your free remote login to your Raspberry Pi, consider the following best practices:
- Regularly update your Raspberry Pi OS and all installed software to ensure security and system stability.
- Monitor your device's resource usage to prevent overload during remote sessions.
- Document the setup process thoroughly for future reference and troubleshooting purposes.
Embracing free remote login to your Raspberry Pi unlocks a vast array of possibilities for users eager to realize the full potential of their devices. By following the guidelines outlined in this document, you can establish a secure and efficient means of accessing your Raspberry Pi from anywhere in the world, all without incurring any financial obligations. Remember to always prioritize security and reliability to safeguard your device and data.
We encourage you to share your experiences, pose questions, and contribute insights in the comments section below. Additionally, explore other articles on our site to uncover more tips and tricks for maximizing the capabilities of your Raspberry Pi. Happy tinkering!
Table of Contents
- Why Free Remote Login to Raspberry Pi Matters
- Prerequisites for Free Remote Login
- Hardware Requirements
- Software Requirements
- Setting Up SSH for Free Remote Login
- Enabling SSH on Raspberry Pi
- Configuring Your Router for Port Forwarding
- Steps for Port Forwarding
- Dynamic DNS for Easier Access
- Setting Up DuckDNS
- Securing Your Remote Connection
- Change Default SSH Port
- Use Strong Passwords or SSH Keys
- Alternative Methods for Free Remote Login
- VNC (Virtual Network Computing)
- Web-Based Interfaces
- Troubleshooting Common Issues
- Unable to Connect via SSH
- Slow Connection Speeds
- Best Practices for Efficient Remote Access
- Conclusion

Detail Author:
- Name : Mr. Glen Keeling III
- Username : abernathy.rafaela
- Email : rmcdermott@mills.com
- Birthdate : 1971-12-27
- Address : 1283 Loyal Viaduct North Wainoburgh, MA 43568-8260
- Phone : 539.268.1689
- Company : Ledner-Howe
- Job : Probation Officers and Correctional Treatment Specialist
- Bio : A fugiat sapiente aliquam voluptatem. At omnis consequuntur sint soluta placeat molestiae eum.
Socials
twitter:
- url : https://twitter.com/rahsaan_id
- username : rahsaan_id
- bio : Et magni laborum et. Quibusdam et dolor animi et sed velit veritatis qui. Harum ullam possimus optio dignissimos reiciendis quia aut temporibus.
- followers : 2699
- following : 2158
facebook:
- url : https://facebook.com/vonrueden2024
- username : vonrueden2024
- bio : Maiores quo eveniet voluptates omnis quia modi nam.
- followers : 1106
- following : 1756
linkedin:
- url : https://linkedin.com/in/rahsaan_dev
- username : rahsaan_dev
- bio : Et autem nihil nihil laudantium eos.
- followers : 6426
- following : 1807
tiktok:
- url : https://tiktok.com/@rahsaan5145
- username : rahsaan5145
- bio : Ab blanditiis et excepturi dicta. Labore ut officiis quisquam voluptas.
- followers : 4952
- following : 316
